

Key Takeaways
Why Air Leaks Deserve Attention Before Anything Else
When homeowners think about cutting energy costs, insulation and new windows often come to mind first. But air leakage - the uncontrolled movement of air through gaps, cracks, and penetrations in a home's shell - is frequently the larger culprit, and it costs far less to address. According to the U.S. Department of Energy, sealing air leaks and adding insulation are among the most cost-effective improvements a homeowner can make.
Unlike insulation, which slows the transfer of heat through surfaces, air sealing stops conditioned air from physically escaping and outdoor air from sneaking in. The two work together: adding attic insulation over an unsealed floor is far less effective than doing both in the right order. Air sealing comes first.
This task also matters beyond energy bills. Drafts carry moisture, which can accumulate inside wall cavities and attic spaces, contributing to mold and structural damage over time. Addressing leaks is a key part of preparing your home for winter - and it pays off in summer too, keeping humid outdoor air from infiltrating during cooling season.
Ventilation Balance Matters
Aggressively sealing a home without accounting for ventilation can trap moisture and indoor air pollutants. Very tight homes generally need mechanical ventilation - such as an energy recovery ventilator - to maintain healthy air quality. If you're doing extensive sealing, consider having a home energy auditor assess your ventilation needs.
What You'll Need Before You Start
Air sealing doesn't require specialized skills or expensive equipment. Most of the materials - caulk, weatherstripping, foam sealant, outlet gaskets - cost only a few dollars each and are widely available. The job is well within the reach of a homeowner comfortable with basic maintenance tasks, as explored in our overview of when DIY home maintenance makes sense.
What you will need
Caulk gun and paintable or silicone caulk
Seals stationary gaps around window and door frames, baseboards, and wall penetrations.
Weatherstripping (foam, V-strip, or door sweep)
Creates a compressible seal on moving parts like door and window edges that caulk cannot flex with.
Expanding foam sealant (low-expansion formulation)
Fills larger irregular gaps around pipes, conduits, and rim joists where caulk won't bridge the space.
Foam backer rod
Pre-fills deep or wide gaps before caulking, reducing material use and creating a better seal.
Outlet gaskets (foam insulator pads)
Inexpensive pre-cut foam pads that seal behind electrical outlet and switch cover plates on exterior walls.
Flashlight and mirror
Helps inspect tight spaces like rim joists, attic hatch edges, and behind appliances for hidden gaps.
Step-by-Step: Finding and Fixing Leaks
Air leaks follow a predictable pattern. They concentrate at transitions - wherever one material meets another, wherever pipes or wires cross a wall or ceiling, and wherever moving parts (doors, windows) need a dynamic rather than a rigid seal. Working through the steps below systematically covers the most impactful locations in a typical home.
Don't Seal Around Gas Appliances or Flues
Never apply caulk, foam, or other sealants around gas appliance flues, chimneys, or combustion air inlets. These areas require proper clearance and fire-rated materials. Improper sealing near combustion equipment can create dangerous backdrafting conditions. Consult a licensed HVAC technician or chimney professional for any work near these areas.
Walk the perimeter and identify visible gaps
Start outside on a dry day. Walk the full exterior perimeter of your home, looking for any point where two different materials meet: where siding meets trim, where brick meets a window frame, where pipes or wires exit the wall. Any gap wider than a hairline is a candidate for sealing. Pay particular attention to corners, where settling can open seams over time. Make a written list or take photos to track what you find.
Test for drafts from the inside
On a windy day, hold a lit incense stick or a single candle near suspected leak points - electrical outlets on exterior walls, window and door frames, baseboards, attic hatch edges, and where the floor meets the wall in older homes. Watch for the smoke or flame to waver. Move slowly along each edge. This low-tech method reveals airflow that isn't visible to the naked eye. Mark problem areas with painter's tape so you can return to seal them.
Seal window and door frames with caulk
On the exterior, apply a continuous bead of paintable or silicone caulk along any gap between the window or door frame and the surrounding siding or trim. Cut the caulk tube tip at a slight angle for control. Press the bead firmly into the gap with a wet fingertip or a caulk tool, then smooth it flat. On the interior, caulk the joint where the window or door casing meets the wall surface. Allow full cure time before painting - check the product label for specifics.
Replace or add weatherstripping on doors
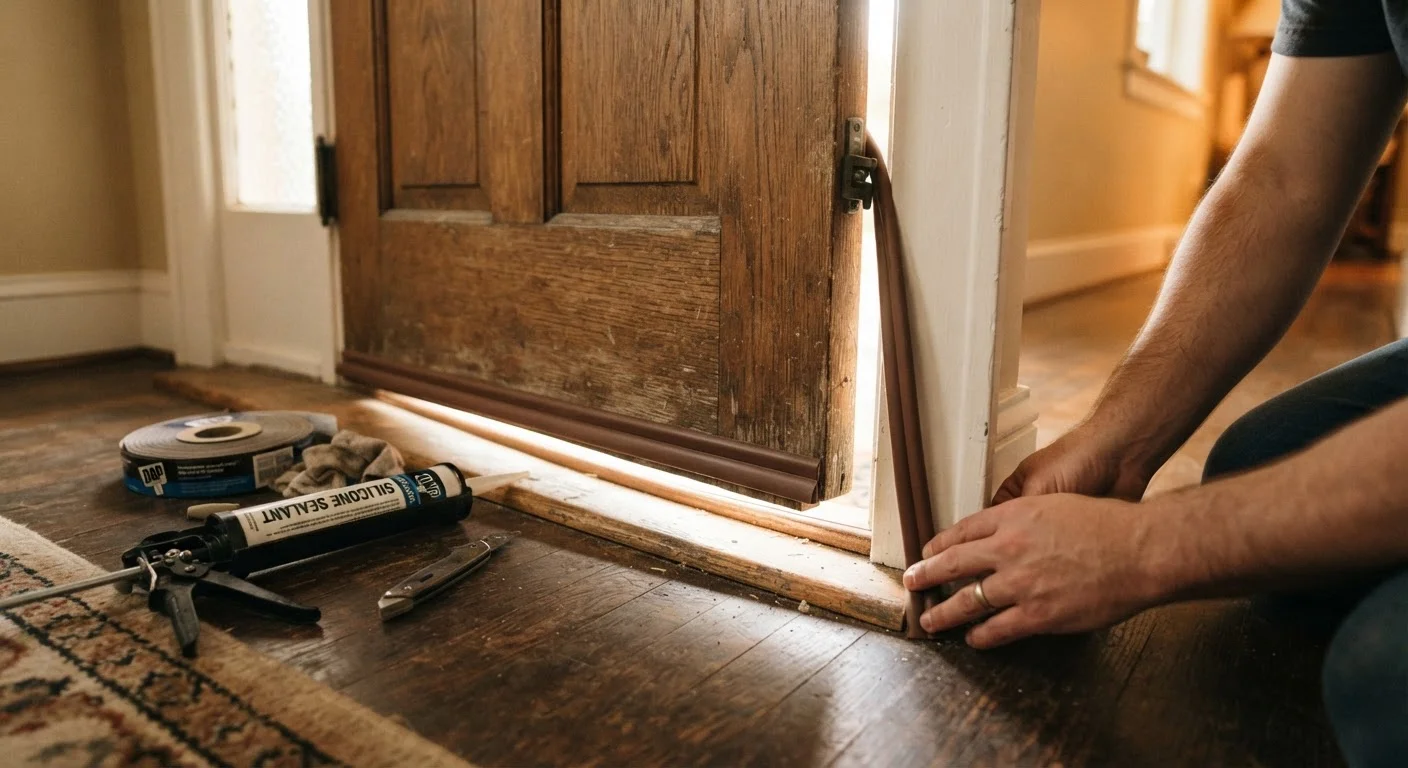
Check existing weatherstripping by closing the door on a piece of paper - if you can pull the paper out easily, the seal is inadequate. Remove old compressed or torn weatherstripping by pulling it free or using a putty knife. Clean the surface, then cut new foam, felt, or V-strip weatherstripping to length and press or nail it firmly in place along all four sides of the door frame. For the door bottom, install or replace the door sweep, adjusting it until it just grazes the threshold when the door closes.
Insulate electrical outlets and switches on exterior walls
Turn off the circuit at the breaker panel before removing any cover plate. Pull off the cover plate and look for gaps around the electrical box. Press a pre-cut foam outlet gasket - available at any hardware store - over the box, then replace the cover plate. These take about two minutes per outlet and address a surprisingly significant source of infiltration in older homes. Restore power when finished.
Address rim joists and attic penetrations
The rim joist - the framing that sits on top of the foundation wall - is one of the most significant leak sites in many homes. In unfinished basements or crawl spaces, look for daylight or feel for cold air along the interior of this band of framing. Use low-expansion foam to seal any gaps between the sill plate and the foundation, and around any pipes or wires that penetrate the rim. In the attic, seal around light fixtures, plumbing stacks, and any top-plates with gaps using fire-rated caulk or foam before adding insulation above.
Pair Air Sealing With Insulation for Best Results
Air sealing and insulation solve different problems: sealing stops air movement, while insulation slows heat transfer. Doing one without the other limits your results. For attic spaces especially, seal penetrations before adding insulation - once batts or blown-in material is in place, finding and fixing leaks underneath becomes much harder. See our attic insulation walkthrough for a plain-language overview of how those two tasks work together.
Common Mistakes That Undermine Your Results
One of the most frequent missteps is treating this as a one-time project. Caulk and weatherstripping degrade over time - foam compresses, silicone can peel away from painted surfaces, and door sweeps wear down from friction. Plan to inspect your sealing work annually, particularly after harsh winters, and re-apply where needed. This falls squarely into the category of maintenance habits that seem minor but prevent costly problems down the line.
Another common error is focusing only on obvious gaps while ignoring less visible ones. Attic hatches are a prime example: an unsealed pull-down attic stair or hatch door can lose more heat than an unsealed window. Similarly, the joint where interior walls meet the ceiling - particularly at exterior walls - can be a significant pathway for air movement. A systematic room-by-room sweep using the draft test described in the steps above helps ensure nothing gets missed.
Finally, don't overlook the basement and crawl space. Rim joists, as noted in Step 6, are among the most impactful sealing opportunities in older homes. If you're considering a basement project, our guide on planning a basement finish covers how moisture control and air sealing fit into the broader picture before any finishing work begins.